In the world of Meringue Buttercreams there are generally 3 types - Swiss, French and Italian. The taste variations are endless - vanilla bean, rose water, chocolate, caramel. It is resiliant, can easily take a plain cake to a masterpiece, easy to handle and to pipe and will be a crowd pleaser.
There are many variations to this recipe but here is the way I do it:-
You will need:-
Ingredients
- Egg whites from 5 large eggs
- 250g caster sugar
- 250g unsalted butter (softened and bought to room temperature)
- Sprinkle of salt
- Metal mixing bowl (I find metal works best as it can be easily cooled)
- Spatula
- Metal whisker
- Mixer
- Large pot or saucepan
1. We need to ensure that all equipment we are using is grease proof, even the slightest bit of grease can make our meringue flop. So before beginning take a paper towel with a smidge of white vinegar and wipe the mixing bowl, spatula, whisk and beaters on the mixer
2. Now that everything is meringue friendly - take your large pot or saucepan and fill roughly a quarter of the way with water and put to simmer on your hot plate or stove top. You don't want your mixing bowl to sit directly over the water, so sit your mixing bowl over the top and if required tip out some water. Bring the water to the boil then turn right down to a low simmer - we don't want the water to cook our egg whites but simply to act as a heating agent
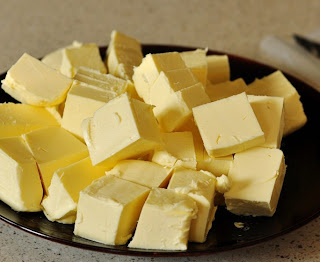
3. Take the unsalted butter and cut into cubes, leaving on a plate to soften
4. Place your egg whites into the mixing bowl, measure out and add your caster sugar and place over our simmering pot. Whisk the egg whites until all of the sugar crystals have dissolved (roughly 10 minutes). As you whisk you will begin to notice the meringue start to form. Once all sugar crystals have dissolved remove from the heat and continue to whisk
5. You will need to continue to whisk the meringue to its full volume and the mixture is cool. Now here is where I will tend to cheat a little if my hand is about to drop off from all that whisking! Because we are using a metal bowl the heat will be retained, to give the mixture of little helping hand to cool down I will place the bowl into a sink of cold water and cool it down that way. Remember though to keep whisking!! We need that meringue to rise baby :)
6. Once you are happy with the meringue base and the mixture is cooled it is time to take to the mixer. If you are fortunate enough to have a kitchen aid (which I am not by the way - hint hint hubby!) put on the whisk attachment and whisk the bowl on a medium mix. Continue to mix the meringue base for roughly another 3-5 minutes, your hand will be so relieved now trust me!
6. Continue to mix our meringue until it is thick and glossy. Ta Da - we now have Swiss Meringue minus the 'buttercream'! And this stuff is to die for!! If you have a greater will power than I do you will be able to resist dipping in your finger.
7. Time for me to stop drooling over this lush Swiss Meringue we have just made and time to add the butter. I add 2 cubes at a time until all incorporated, then add another 2 and so on until all our butter has gone - this may seem time consuming but it is worth the extra effort
8. As you add in all your butter you will see the meringue will begin to deflate - Don't Panic!! Keep the beater on and it will fluff back up
9. Now if your buttercream starts to look like scrambled eggs above, hold your head high and carry on! Swiss Meringue Buttercream although a little naughty at times is very forgiving, just keep on beating at a low speed and like magic it will suddenly come together and thicken up
10. Keep mixing until it gets to a consistancy that you love - smooth, light and fluffy. Add a few drops of vanilla bean and a sprinkle of salt to your tasting and presto you are ready to decorate!!
Points to remember:-
- if the buttercream is to runny take the bowl from the mixer and place in the fridge for roughly 10 mins then beat again
- if still to runny add one or two more cubes of butter and keep beating
- you can freeze your buttercream for 4-6 weeks. To thaw place on the kitchen bench overnight and re-whip the next day for roughly 10 minutes or until back to consistancy required
Chocolate Buttercream - Add 150g melted high quality dark chocolate to the mixture and beat until incorporated
Rose Water Buttercream - instead of Vanilla add in a few drops of Rose Water to your tasting
Vanilla Bean - scrape the seeds from a Vanilla Bean and beat until incorporated
Fruit Buttercream - Add approximately half a cup or strawberry, raspberry, blueberry puree to the buttercream, beat until incorporated
Kahlua Buttercream - adult version - a couple of drops of Kahlua to the mix is delightful!!
You can colour it, flavour it, play with it but most of all have fun with it!! Experiment - add some to a piping bag and decorate away.
Goodluck
Nanna P x


No comments:
Post a Comment